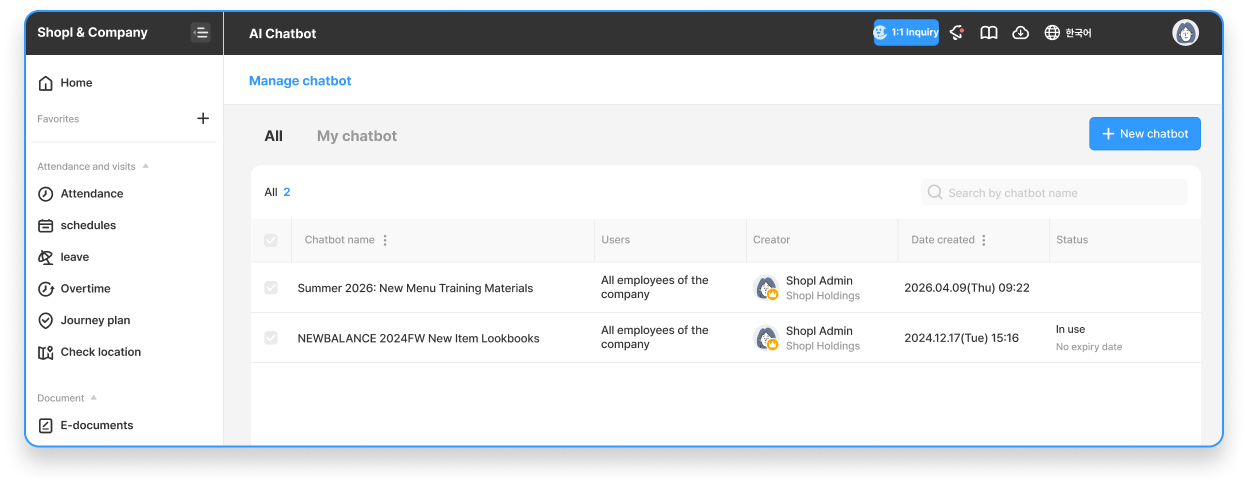
Dashboard > [AI Chatbot] > Click the [+ New chatbot] button at the top.
You can create up to 30 chatbots in total. (Includes both active and inactive chatbots)
If you need additional chatbots, please contact us via 1:1 chat support.
When the create New chatbot window appears, configure the following items in order.
Basic info Settings
Profile image: Register an image to serve as the chatbot's face. (If not set, Sample images will be applied.)
Chatbot name: Enter the name of the chatbot. (Max. 50 characters)
User guide (Optional): This is an instructional message that ermployees can see in the Chat room. It's helpful to include the chatbot's topic or How to use it.
The entered user guide can be viewed by employees using the chatbot in the Chat room.
Document Training and Permission setting
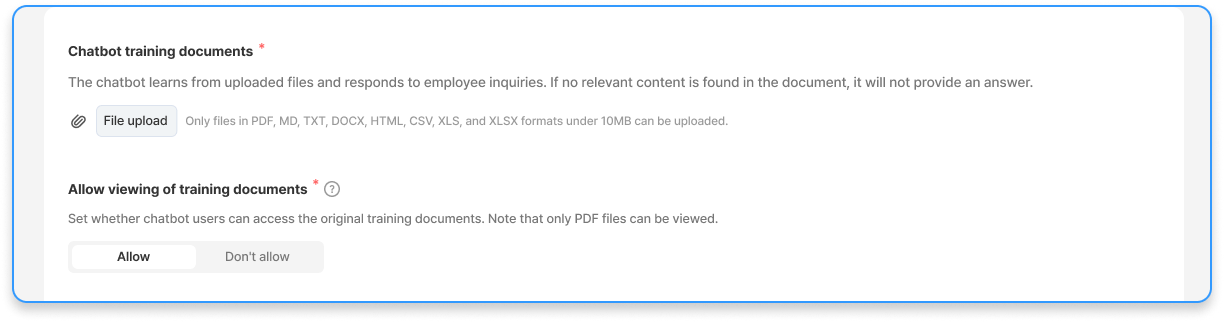
Chatbot training documents upload: Register the document that the chatbot will use as the basis for its response.
Attention: Only 1 File of 10MB or less in size can be uploaded.
Document updates: When contents need to be updated, simply delete the existing File and upload a new one.
💡 If you have multiple materials to train, please merge them into one File or create a separate chatbot for each.
Allow viewing of training documents: Choose whether to allow employees to directly download/view the original document.
Note: Viewing is only possible when the original File is in 'PDF' format. (Files in other formats cannot be viewed and are marked as impossible.)
Users and Period Settings
Users settings: Specify the employees who will use the chatbot.
Option: All employees / Specific group and job level / Specific employees (※ Admins are included by default)
Period of use settings: Specify the period during which the chatbot will be active.
Once the specified period has passed, employees will no longer be able to use it.
💡 Admins can access it at any time even after the period ends, and extending the period of use will allow employees to use it again.
Save and Done
Once all settings are configured, click the [Save] button in the upper right corner.
📢 Instructions
The created chatbot can only be used in the [AI Chatbot] Menu of the Shopl app. (Settings can only be configured on PC, and usage is only available on the APP.)
For detailed information on how to use the chatbot, please refer to the following User guide!