세콤, 캡스, KT텔레캅 연동으로 손쉽게 출퇴근 하세요!


Reference: The dates on which employees can upload data are configured by admins. (e.g., Upload today's data only / Upload data from up to the most recent xx days including today)
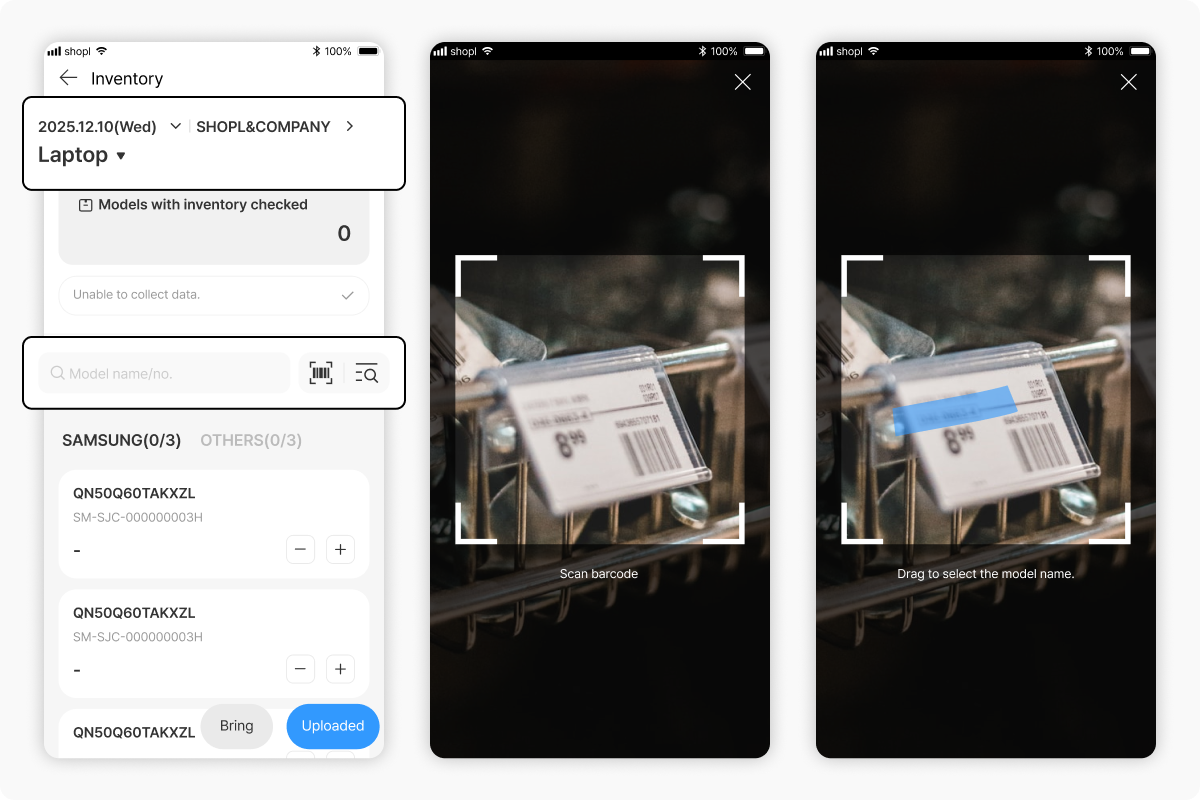
1. Menu or Today's Task > Inventory > Select the collection date and collection workplace at the top.
2. Select the Product category for which you want to register Inventory data.
❗Only product categories for which the user has been assigned as an Employee who collected will be displayed. Please check with your Company Admin to confirm whether you have been assigned as an Employee who collected.
3. You can Search for a Model name/no. or scroll down to find a model directly.
.png)
4. Enter the collected inventory for each Brand – Model.
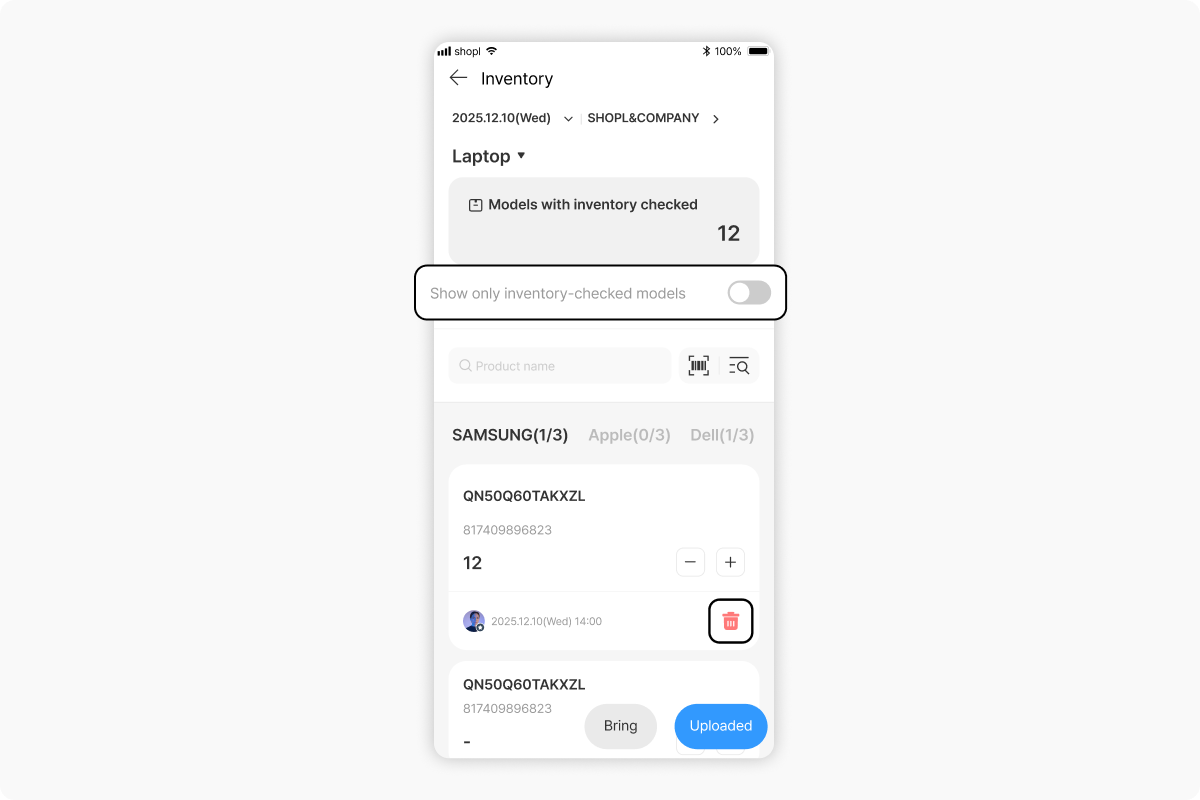
1. Menu or Today's Task > Inventory > Select the collection date and collection workplace at the top.
2. Select the Product category of the Inventory data you want to Delete or edit.
3. If you want to edit entered Inventory data: Activate "Show only inventory-checked models" to Sort and display only models that have had Inventory data uploaded. You can then directly edit the Inventory data that needs to be changed in that List.
4. If you want to Delete entered Inventory data: Tap the Model name tab > click the trash can Icon at the bottom right to Delete the entered Inventory data.
In addition to data collected by employees, admins can also Add Inventory data directly.
.png)
1. Dashboard > Inventory > Click 'Add inventory data' in the upper right corner.
2. Click the Model name field.
❗Models must be added to the List of models before data can be added!
3. Model name > Select the Product category/Brand/Model to which you want to Add Inventory data, then press the Apply button.
4. Enter all of the following: the date for Add inventory data / Store / Employee who collected / inventory quantity.
5. Press the Save button.
When an admin adds Price data directly, it can be added in bulk via an EXCEL Files.
1. Dashboard > Inventory > Click 'Add inventory data in bulk' in the upper right corner.
2. Select the Product category to add data for > Click Download sample.
3. Open the downloaded EXCEL Files and fill in the data for the selected Product category in bulk.
4. Dashboard > Add inventory data in bulk > Search > Attach the completed EXCEL Files with the entered data.
5. After pressing Apply, review and Edit the information to be Registered in the Preview screen below.
6. Directly click on any Error lines shown in red to Edit them.
7. Select the data you want to finally Upload, then press Save.